
Thursday, November 7, 2013
Wednesday, November 6, 2013
Roasted Red Pepper Hummus
Hummus is one of those easy to make foods that can be extremely versatile! Plus, it's great for your body so how can you go wrong? I tinkered around and came up with my favorite roasted red pepper version. Also, it's kid approved.

Roasted Red Pepper Hummus
1 15 oz can garbanzo beans drained and rinsed
2 cloves garlic or ¼ teaspoon garlic powder
1/3 cup jarred roasted red peppers
2 tablespoons Tahini (optional)
2 tablespoons olive oil
2 tablespoons fresh lemon juice
½ teaspoon cumin
¼ teaspoon onion powder
1/8 teaspoon chili powder
¼ teaspoon sea salt or to taste
¼ teaspoon pepper or to taste

Wednesday, October 30, 2013
Fall Leaf Impression
This is a simple and fun craft for kids at any age. Go outside and collect your favorite fallen leaves. Set or gently tape them down to the table. Set a sheet of paper over the leaves and at an angle draw back and forth over them. You can always make it educational by talking about the different parts of the leaves you can see through the impressions like the veins and leafstalk. See more interesting leaf info HERE. Happy Fall Ya'll!


Monday, October 21, 2013
Cupcake Wrapper Flowers
Missing Summer Yet? We are! Make these cute flowers to bring the warmth back into your home with your little ones.
 |
You probably already have the items necessary to make these
cute spring flowers at your home. Kids
love how simple and adorable they are.
Popsicle sticks
Buttons or beads
Cupcake wrappers
Markers or paint
Glue
Green construction paper

Steps:
Paint your popsicle sticks green or use a marker to color
them and let dry.
Paint your cupcake
wrappers as well if you want.

Push wrappers inside out and glue to your popsicle stick.
Glue beads or buttons in the center of your cupcake wrapper.

Fold your construction paper in half and draw a leaf on the
folded edge. Cut them out, unfold and
glue to back of your sticks.

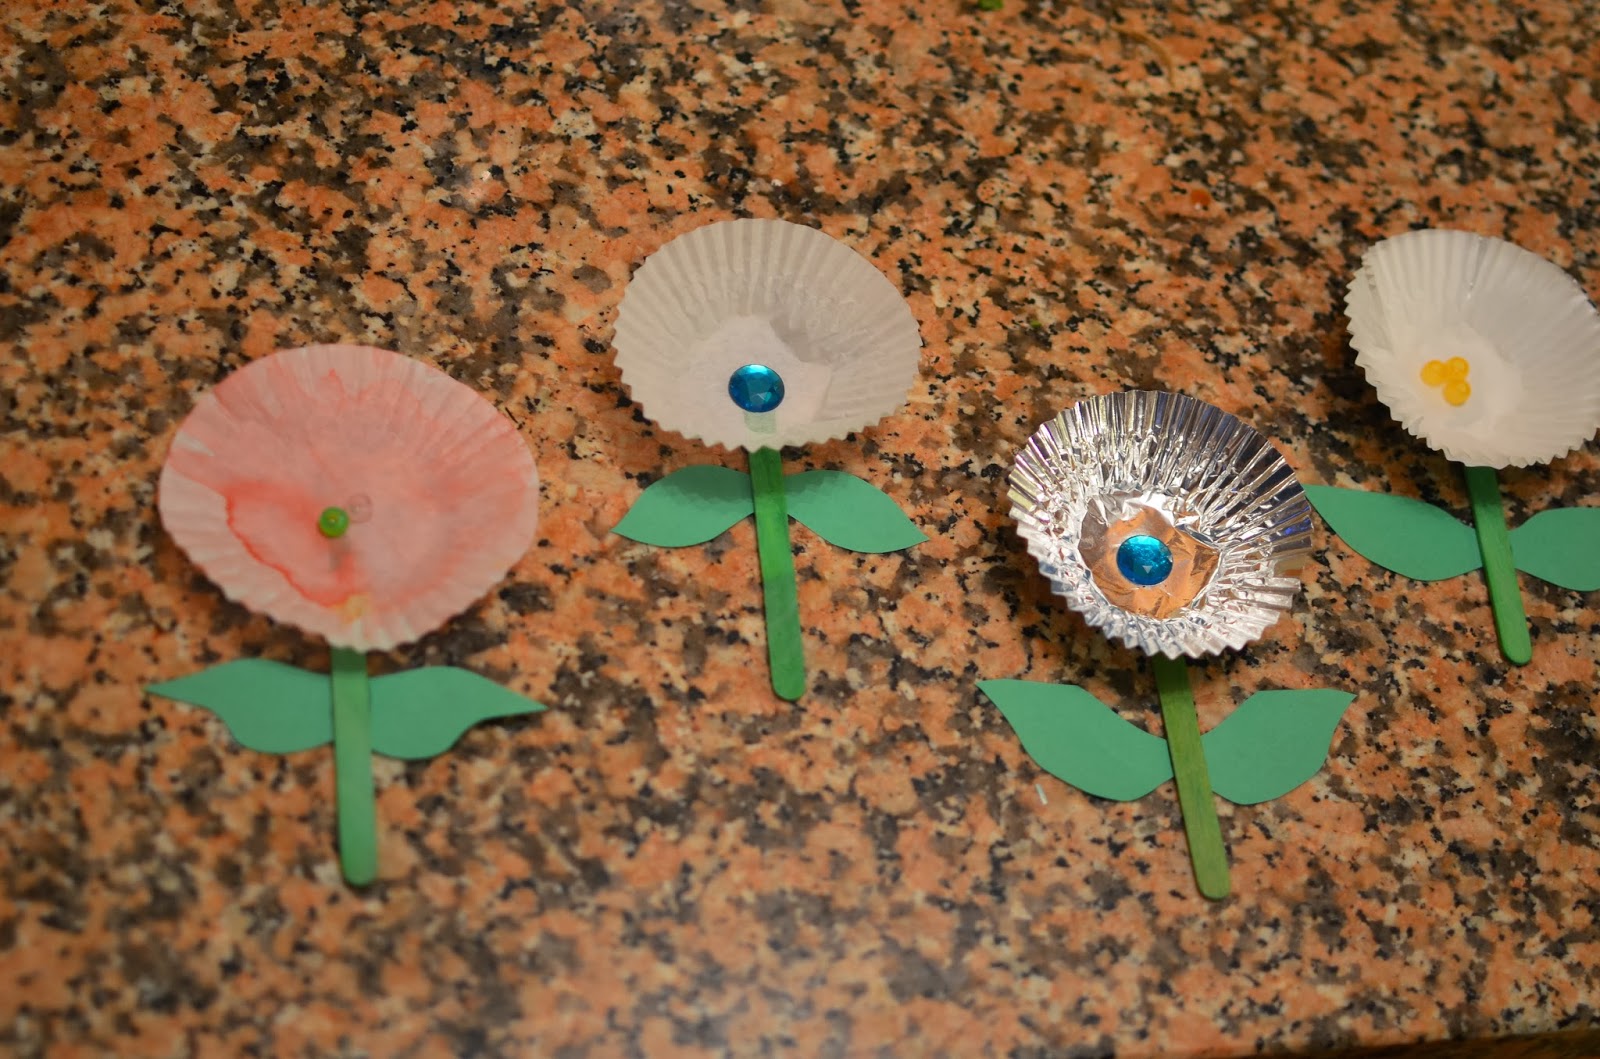
You can really get creative with these by doubling up the
wrappers to create a layered look or by cutting the wrappers to form shaped
petals and you can use almost anything for the center of the flower! Play with them individually or glue them to a piece of construction paper to display!

Tuesday, October 15, 2013
Hot Air Balloon Craft
.jpg)
You will need:
Paper plates
Construction paper
Yarn or string
Hole punch or glue
Markers, crayons or paints
Decorate the paper plate.
We wanted to paint ours so we flipped it over to the non-waxy side and
used markers and watercolors. Feel free
to use glitter, stickers or whatever excites your child and decorate both or
just one side. Let it dry.
.jpg)
Cut out your basket from your construction paper. You can use a square or trapezoid.
.jpg)
Punch out holes in the plate and basket and string together
with yarn or use glue if you don’t have a hole punch.
.jpg)
Hang it high and let it twist and turn in the wind.
.jpg)
Wednesday, October 9, 2013
You’re on a roll bird feeder

The birds are on their way out of here but we try to
keep them coming back each morning with this easy and inexpensive diy bird
feeder. This is a perfect project for
little ones and they love the idea of feeding the birds.
Empty toilet paper rolls
Peanut butter
Bird seed
Steps:
Use a knife to spread a thin layer of peanut butter on the
entire toilet paper roll.

Have your child roll it in the seeds.

Slide it on a branch, and wait!


Monday, October 7, 2013
Edible Art
This is a simple activity that can be educational and
tasty. It’s great for learning how to
categorize and also helps to improve fine motor skills. Understanding how these treats can be
organized in different ways develops abstract thinking and putting them in
place on the paper improves eye hand coordination.
You will need:
Glue stick if you want it to be permanent
Colorful round cereal
Cotton balls (optional)
Print out sheets (2) You should be able to right click on them and choose to print
Steps:
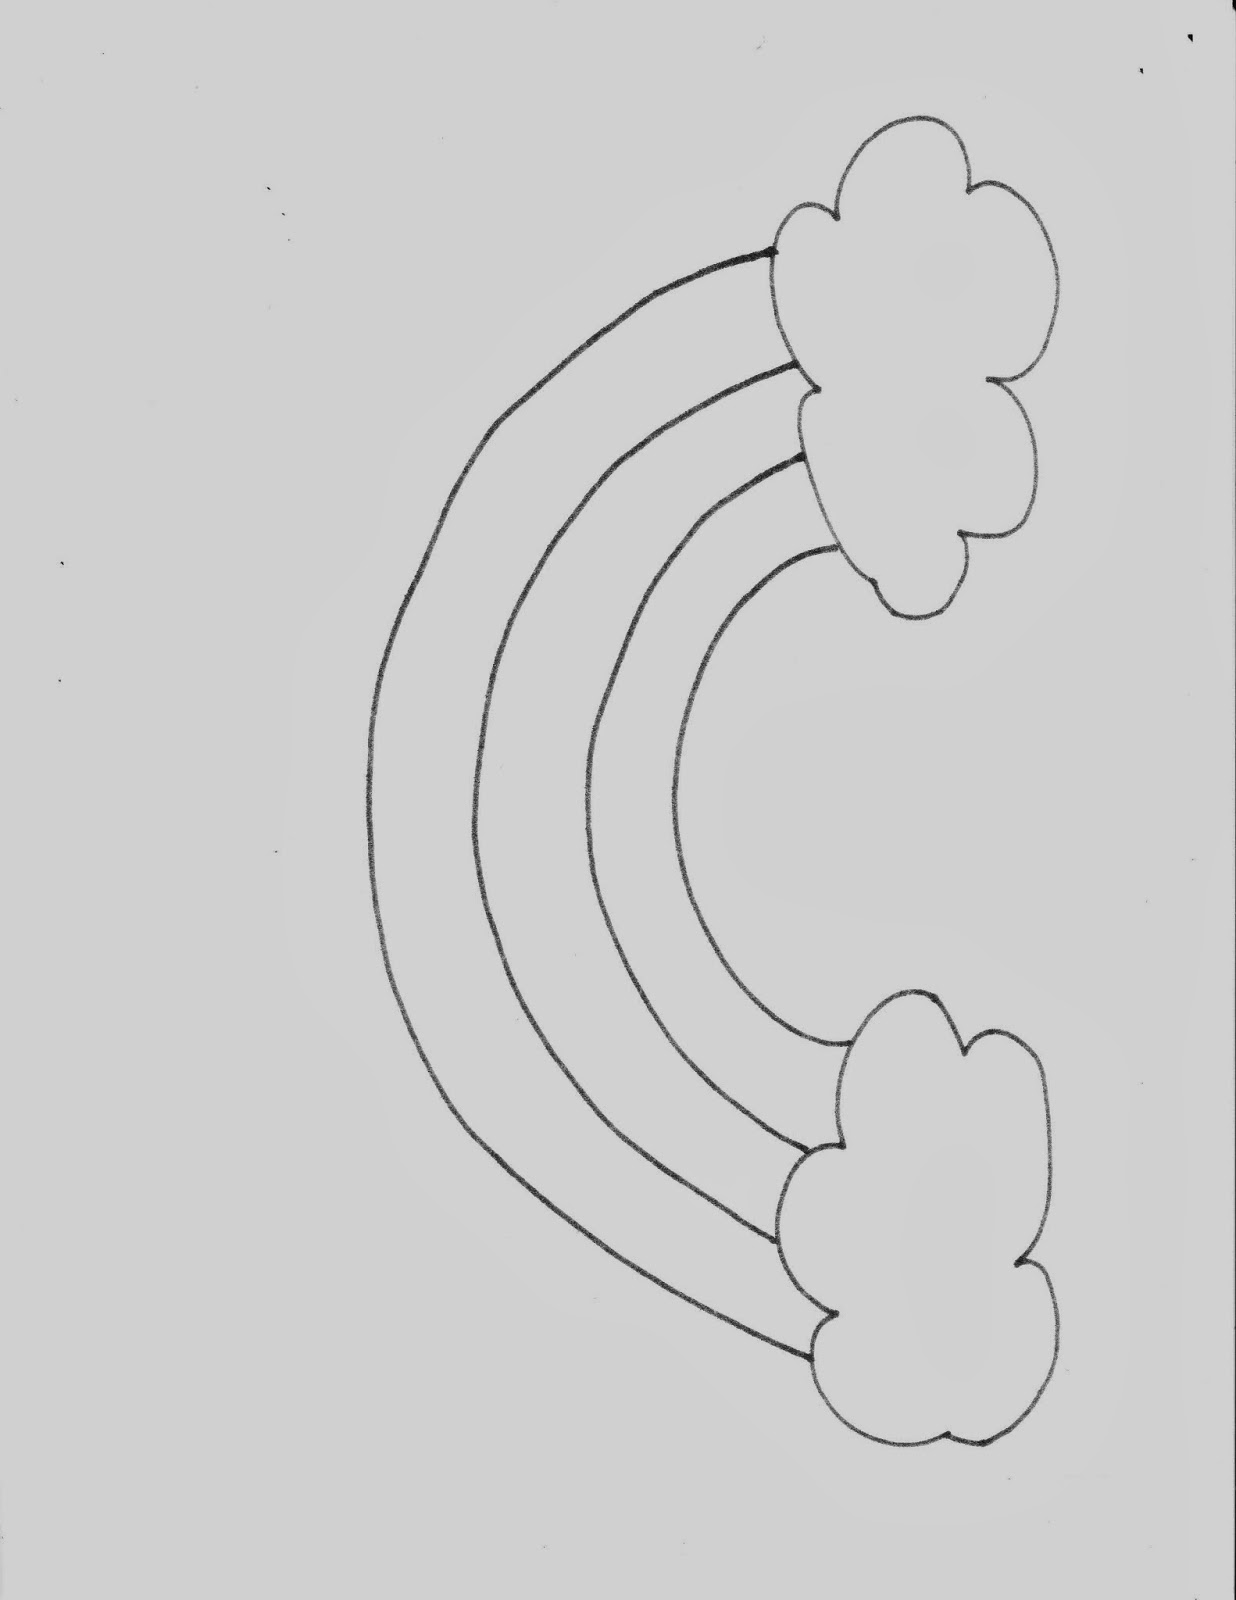
Rainbow Picture: Spread
out a handful of cereal onto the table.
Have you child choose three colors for the arches and then group them by
color. Then have your child place each
piece in between the arches to form a rainbow.
Talk about how many you need on each arch and count them out. Glue your cotton balls onto the clouds. At this point you can eat the cereal pieces or
glue them down! Make sure they don’t eat them after they
adhere the glue. That's pretty obvious right? YUCK!

Flower bouquet: Have
your child pick different colors and place at the top of each stem. Glue down with glue stick. Talk about the parts of the flower such as the
stem, the petals and the seeds. Don’t
forget about Mrs. Butterfly, she needs one on her wing!


Have fun!
Wednesday, October 2, 2013
Easy Peazy Homemade Play Dough!
My kids love kneading, rolling and sometimes throwing play
dough. Most of the time when all the fun
is done the lid doesn’t get put on the jar correctly and it inevitably dries
out. Never fear, homemade play dough is here! It is super simple, non-toxic and I bet you
already have all of the ingredients in your cabinets. It’s a great way to “cook” with your kids and
when you are done in the kitchen the fun doesn’t have to stop.
Ingredients:
2 cup of all-purpose flour
2 cup of boiling water (try the microwave for 3 minutes)
1 cup of salt
2 tablespoons cream of tartar
2 tablespoons vegetable oil
Food coloring (use at the end)

Mix all ingredients together in a bowl adding the water
last. Mom or Dad should handle the hot water!
Make sure the water doesn’t cool too much before you add it in, otherwise it
will not congeal.

Use a wooden spoon to mix until it becomes too sticky to turn. Turn out onto a table and knead to desired
consistency. Separate then add food
coloring and knead again.
.JPG)
Tips:
Put your dough in a plastic zip bag and it will be ready for
next time!
Use essential oil to add scent. Try lavender or peppermint! A drop or two will do.
Why not add a little glitter?
Gel food coloring tends to yield more vibrant colors but any
kind will do. Why not take this time to
also make it a learning experience about color combinations. For example how red and blue make purple.
Amanda Carson
.JPG)
Wednesday, October 3, 2012
Che Bella Siena
 |
| Siena is a town located in the Tuscany region of Italy. It is famous for many reasons but mostly for it's annual horse race and it's medieval and unique architecture. It has stayed this way over the years because the city was abandoned as a central hub because of the lack of a nearby waterway. Every great old city needs a waterway for transportation of goods, etc. Siena doesn't have one so it was not updated with new architecture over the years. The Florentines were able to take away power from them through treason of a single man and become the next great expanding power. |
 |
| In the left side of this picture you see the Basilica Santa Domenico of which you can find the head of Saint Catherine of Siena. Yes, the head. (To your benefit, photos were not allowed in the chuch). Relics, or bones or body parts, are often found in Catholic churches in honor of Saints. Our guide explained that before television and modern communication it was a way to prove that this person existed and people felt that there messages and prayers had more solidity if you could pass them along through the relics. |
 |
| Saint Catherine of Siena was one child of a family of 25. From childhood she became anorexic as she passed along any available food to her siblings. She remained a very small person because of this, almost child like until her 30's when she passed away. They say before her death she was only able to chew on herbs to stay alive because of the damage of her anorexia. She was a very influential person who had many powerful leaders knocking on her door and bowing down at her feet. She even convinced the pope to move to Rome after exiled to France where all proceeding have stayed ever since. |
 |
| Here is a shot of the basilica. |
 |
| This green and white marble tower sets Siena apart. It's absolutely breathtaking. The homes built around it follow the old city walls. They simply just kept expanding and it led to these waving streets and views. |
 |
| There are many hills in Siena which make for beautiful sky line. |
 |
| Siena had some of the first bathrooms as you can see here that were built off the homes interior. The only problem is the brick you see here was not originally there so, uh hum, the "goods" where just dropped onto the streets and pushed into the common areas by rain water. It's no surprise the plague took its toll here. |
 |
| This is the location of Saint Catherine's original home which of course looks very different today but the portico's are just beautiful aren't they? |
 |
| Here you see some of the flags that hang all over the city to represent it's "region" or "team" |
 |
| Some of these simple foods and settings really make Italy charming. |
 |
| Since the streets are so uneven, the ristorante's must make even ground for diners. |
 |
| Here is a photo of the most recent horse race winner! |
 |
| I found lots of humor in Siena. The people that live here must be happy! |
 |
| A typical view from inside the city walls where very limited traffic is allowed. |
 |
| More beautiful pottery and humor (see sign) |
 |
| The beautiful duomo that boasts the famous tower seen below. |

 |
| When visiting here you see the cathedral seems to spread out into the city because the marble keeps on going into the courtyards. The truth is that these outside walls were suppose to be inside. The plague struck when working on its expansion and because so many workers perished it was never completed. |
 |
| This area is famous for its wild pig. Here is more Sienese humor. (Note the glasses). |
 |
| This piazza when entering takes your breath away. Its shaped like a seashell and sloped upwards. This is the bottom of the seashell seen here. |
 |
| Here you see some amazing architecture with the Siena seal and clock tower at the base of the piazza. |
 |
| Spanning out into the piazza you can see the shell start to take place. Apparently the corner seen ahead is the most treacherous during the race. Many horses and jockeys go down here. It was interesting for me to find out that the race is only three laps and if the horse finishes without the jockey it is still considered a win. They consider the horse more of a racer than the jockey. Only 10 horses out of th 17 regional teams qualify for the race that takes place twice a year. July and August. The entire piazza fills with people on the inside and is covered with sand to help the horses. |
 |
| Here is the top of the shell. There is such a variety of architecture shown here. |
 |
| More fantastic craftsmanship. |
 |
| The she wolf is a symbol of the city as seen above. |
 |
| Here I am having an amazing lunch and Chianti wine to end my day in Siena. The veal and chicken liver is famous in the area so I had to try it. It was delicious but I never do feel right about eating veal. However, as the expression goes, When in Rome.....or Siena in this case! |
Subscribe to:
Posts (Atom)